Convert a Java Web Application (a WAR file) to a Desktop App
 Building a new software tool as web application is a great way to let lots of people have access to your creation without requiring them to install anything on their computer. Just deploy your application on a server, share the URL, and you’re done. It’s cross platform, and it’s installation-free. It’s become the default architecture much of our modern software.
But sometimes you really do want a desktop app. Perhaps you want your software to run without internet access. Perhaps you need to point it to proprietary data. Perhaps you need to use the local CPU to support complex numerical calculations. Whatever the reason, sometimes you really do want a desktop application.
Can we have it both ways? Write a web application that you can deploy with ease? And have a “wrapper” to make it distributable as a desktop app?
This was what I set out to accomplish for a Java-based software system that we’re developing in my lab. I wanted to build a web app in Java that I could package as a WAR file for deployment via a web application server like Apache Tomcat. Then I wanted to package the exact same WAR file that I could deploy with Tomcat as a desktop app which—to the user—didn’t look like a web app at all. In essence, I wanted the same end result you get with Electron for Node.js applications: I wanted to use web-technologies to build a desktop app that had the look and feel of a traditional desktop application.
I’ve tried this a few times over the years and never found a simple, straight-forward solution. Until today. Here are my step-by-step instructions in case there is anyone else out there is looking to solve the same problem.
Step One: Build Your Web Application
The first step is to build your web application and package it as a WAR file. The good news is that you don’t need to do anything special for this step. You can build it for the web, deploy it with Tomcat, debug it in your web browser. All the same steps you’d normally take for a traditional Java-based web application.
Step Two: Get the Tomcat webapp-runner Library
To begin creating your desktop app, next want to download the webapp-runner library created by John Simone. You should grab it as a jar, which I downloaded directly from the Maven website.
The webapp-running jar is designed to let you launch Tomcat with a specific WAR file from the command line, without having to install Tomcat first. This is useful on its own, but it’s really a critical part of running your WAR file into a desktop app.
Step Three: Get JxBrowser
Next you’ll need a Java UI component that can run a modern web browser. The best option seems to be JxBrowser, though it costs money to license. You can try it free for 30 days to see if it meets your needs. Better yet, if you are working on an Open Source or Academic project (that’s me!) you can apply for a free license.
There are other options, but many seem to use older versions of webkit or have some other limitations. JxBrowser is modern, and easy to use. You’ll see below that the code required to get things up and running is quite simple and short.
Step Four: Create a New Java Application that “Wraps” your WAR File
Believe it or not, we’re almost done. The next step is to code up a very small single-file Java application that will serve as a “wrapper” around your WAR file. It will bundle the WAR file, with the Tomcat webapp-runner library, together with the Chromium-based JxBrowser component into a single Java application.
I created a new Java project in my IDE, then created a subdirectory called “war” into which I copied the WAR file I created in step one. Then I created a subdirectory called “lib” in which I placed the JxBrowser and webapp-runner jars.
Finally, I created a new Java class with the following code:
public class DesktopApp {
    public static void main(String[] _args) {
        // Launch the web app using an embedded version of Tomcat
        Process _p = null;
        try {
            _p = Runtime.getRuntime().exec("java -jar lib/webapp-runner-8.5.15.0.jar --port 18789 war/Cadence.war");
        }
        catch (Exception e){
            System.out.println(e.getMessage());
            return;
        }

        // Create the browser.
        Browser _browser = new Browser();
        BrowserView _view = new BrowserView(_browser);

        // Put the browser into a JFrame
        JFrame _frame = new JFrame();
        _frame.setDefaultCloseOperation(JFrame.EXIT_ON_CLOSE);
        _frame.add(_view, BorderLayout.CENTER);
        _frame.setSize(1200,800);

        // Set up a listener to kill the web server when the user closes the window.
        _frame.addWindowListener(new WindowAdapter() {
            private Process process = null;

            @Override
            public void windowClosing(WindowEvent _e) {
                if (process != null) {
                    process.destroyForcibly();
                }
            }

            private WindowAdapter init(Process _p) {
                process = _p;
                return this;
            }
        }.init(_p));

        // Point the browser to the server and display the JFrame.
        _browser.loadURL("http://localhost:18789/");
        _frame.setVisible(true);
    }
}
That’s it. Just one big main() method within which there are four high-level steps.
- First, the war file is launched on a locally-running server using exec.
- Second, a Swing-based Java desktop application is created with just a single JxBrowser as the only UI component.
- Third, a listener is added to the Java application to detect when the program is closed. In that callback (which only gets called when the app is closed), the locally-running Tomcat server is terminated.
- The fourth and final step is to point the browser to the local web server you just started and make the parent Swing frame visible to the user.
Of course, the code above has a hardcoded port and WAR file. You could make those configurable if you wish. For example, they could be put into a configuration file to make this a truly generic “wrapper” that could be applied to any WAR file.
Step Five: Bundle the Java Application for Your Operating System
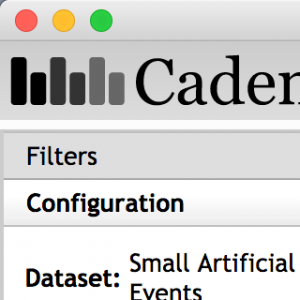
Your software will run locally after step 4. However, it will feel like a Java application, not a native app. To get over this last hurdle, you can use the Oracle Appbundler. I followed these instructions to build a native-looking OS X app for my Macbook Pro. It sits on the Dock, has its own icon, and come bundled with its own JRE so it runs even on laptops without Java installed.
Code Available on GitHub
I’ve posted the code for this on Github if you want to download a copy to use with your own project. Click here to visit the repository.
Conclusion
These steps have worked for me, but I don’t make any guarantees. The best part, in my mind, is the relative simplicity of this approach (just a single main method to code!). Moreover, it’s 100% compatible with the typical WAR file I’d use to deploy my app on a hosted server. That means I can develop the software once, and deploy both online and as a desktop app. Code doesn’t get more reusable than that!
Sch of Inform and Libr Science